Wednesday, December 11, 2013

Curried Butternut Squash with Red Chard

It's almost the end of the semester! Final projects and final exams are everywhere sucking up time like giant time vacuums! I don't even know what a time vacuum is, but maybe it removes all the trash in your time, like browsing the internet, watching TV shows and the like? With final project time vacuums, none that useless stuff is left! Success! Or something like that.

Anyways, you know what the time vacuums have not sucked away? Time spent making food. I made some pretty darn delicious food yesterday. At some point in the past month, I saw mini butternut squashes at Safeway (they call it Vons here, but really it's Safeway), so I jumped on the opportunity to buy squash that I wouldn't have to spend multiple weeks eating. This week, I finally got around to cooking it. I first roasted the squash Sunday night:

Roasted squash! I couldn't help but try a spoonful
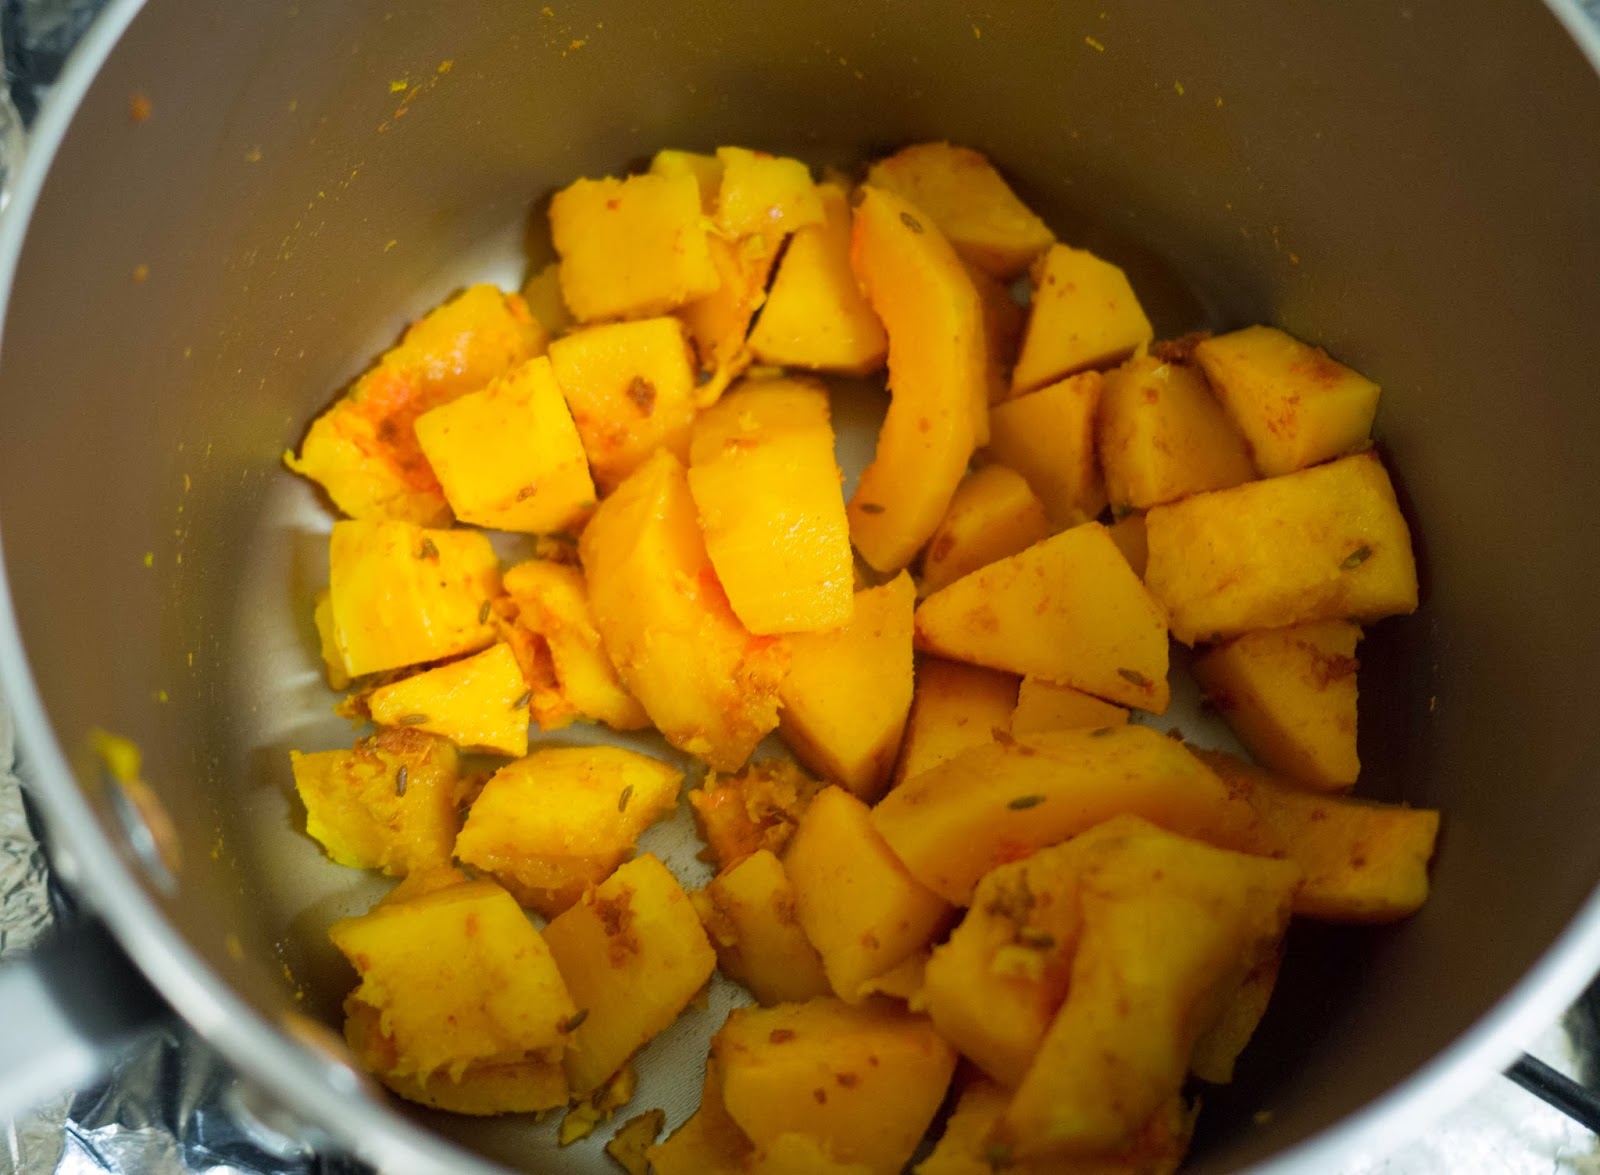
On Tuesday night, I actually got around to preparing the squash for consumption. Since my friend had some extra coconut milk, I decided to prepare it curry-style with ginger, cumin, turmeric, curry powder, cardamom, and a good spoonful of Thai red curry paste. I heated some oil in a pan and fried the spices to "release the aromas" (as they always say on America's Test Kitchen).


I sliced up the squash, and added it to the spices. I let it cook for a while.


And then added about a quarter cup of coconut milk and mushed up some of the squash pieces. 


At SafeVons, I also found a beautiful bunch of red chard, so I decided to try it out by simply sautéing it in a bit of oil.


Yay balanced meals! The squash was super delicious, with the ginger, curry, and cardamom being the strongest flavors. The chard was chard-like, which I liked.  Also, I can make rice now....


Monday, October 7, 2013

Apple Salad


I'm back from the Grace Hopper Celebration of Women in Computing! It was awesome. Check out this lab's research on prosthetic retinae.

The food at the conference was definitely not the emphasis though; dinner on Wednesday consisted of a dry and vegetable-less turkey sandwich with a cookie. My dinner tonight is much tastier. I got a giant acorn squash from Trader Joe's yesterday, and I was totally going to cook it tonight. Then Laziness struck. So instead I made a quesadilla and salad.

But the salad. It is a special salad. I started with an apple. I don't usually put apples in salads, but my friend had me try apples with dressing a couple weeks ago, and I had to agree that it works well. I chopped up an apple into my usual mustard-olive oil-vinegar dressing. Then I added some romaine and some kale. To add color, I chopped up some of my ever-present baby carrots. When I tried my creation, it was good, but was missing some creaminess and tang: crumbled goat cheese brought the salad to a new level.

Tuesday, September 17, 2013

So, apparently I don't know how to cook rice

For tonight's dinner, I decided to make rice. I hadn't really made rice in a pot before, but I figured it shouldn't be too difficult. I followed the instructions on the package and put my pot on the burner. When my timer went off, there was a surprise waiting for me! My rice had stuck to itself to form a sort of rice cracked! And I had over-salted it, so it tasted like a rice cracker too. 


Luckily I had delicious leftovers to eat with the rice: indian food doggy bag boosted with cabbage and tomato. And I'm glad the rice did not stick to the pot.

Sunday, September 15, 2013

Tomato-Jicama-Avocado Salad


It is what it sounds like! I'm back at school and I'm making my own dinners this semester, so I'm learning to cook from what I have. This evening, I looked in my fridge and saw cabbage, plums, and baby carrots. Eh. Then I saw the tomatoes I had gotten at the farmer's market last weekend, and the jicama from 2 weeks ago. Maybe I could make a salad. After all, I had been wanting to try the avocado I got last weekend.

I made a quick vinaigrette with mustard, cider vinegar, and olive oil. I chopped up three small tomatoes, and about a sixth of a jicama. I cubed half the avocado, and added some cubed cheese for good measure. With some salt and pepper, a slice of toasted bread, this was a very passable dinner. The cheese (part skim mozzarella) and the avocado did not pair very well though. A crumblier cheese like
queso fresco or feta would probably have worked better.

Monday, July 1, 2013

Goat Curry

My roommate and I share a passion for grocery stores. That's a normal interest, right? I kind of want to add "Grocery store enthusiast" to my "about me" section.

So, on our way back from work one evening, we couldn't resist exploring the grocery store that we had passed by a couple times. It seemed pretty standard, but with some slightly exotic produce such as taro and chayote. It also stocked goat meat. In a stroke of "great minds think alike", we both immediately concluded that goat curry was going to happen.

After some research to find a recipe using few different spices, we found this recipe on indiansimmer.com, which asked for cumin, coriander, cardamom, cinnamon, and bay leaves. We got these spices in ridiculously large portions for ridiculously cheap from the local international market.


The curry is pretty simple: sautée the spices in oil, add the onion garlic and ginger, add the goat meat, add the tomatoes and salt, simmer for 25 minutes.

The resulting dish was good, but not perfect. The goat meat was rather tough. We each attempted to eat with our respective favorite utensils (fork and knife for me, chopsticks for my roommate) but these quickly proved to be useless. After agreeing on a no-judgement policy, we ended up ripping meat from the bones with our hands and teeth. 


Also, the meat was not at all seared and the dish was too greasy. The recipe says to sear the meat after adding the onions, but (at least in our pan) there simply isn't space to do so. So, my roommate and I thought that a way to fix both problems could be first searing the meat without oil and rendering some of its fat, and using that fat (rather than extra oil) to sautée the spices and onions.

Saturday, June 15, 2013

New York

Duuude it's been forever. I'm in New York now. Like, New York, New York. Manhattan. In the middle. For three months. This is pretty exciting.

Living in New York City is very different from the California suburbs I'm always lived in. Cars are honking all over the place. There are regular wafts of rotting food and sewers. It rains in summer. It's hot even if the sun is gone.

What surprised me the most was the cost of food. The cheap restaurants have $7 sandwiches and $12 entrées. Most restaurants have entrées at $15-20. The food in grocery stores is also more expensive, especially the produce, all of which is imported from California.

However, I am not doomed! By the wonders of Yelp, I found a very cheap produce market: http://www.yelp.com/biz/stiles-farmers-market-new-york. Three dollars for four tomatoes and 2 bell peppers? Sounds good to me!

I was curious as to what I would end up cooking when I need to cook for myself regularly. As the kitchen obviously did not come stocked with spices, it is difficult to make anything fancy because I only have the basics in my pantry: The flavorings I have so far are salt, pepper, cinnamon, and hot sauce.

When I first got here, I made a lot of eggs. Specifically, fried eggs on toast with goat cheese and marinara sauce. Then I switched to cabbage and leek pancakes (like this, but I've actually figured a much better way of doing it). I've also made pasta with tomato/bell pepper sauce, and well as tomato/bell pepper salad.

What about New York? Well, I took some pictures!

Saturday, March 30, 2013

Fountain Pens!

A couple weeks ago in chem lab, I noticed that my lab partner was writing in her lab notebook with a fountain pen. A fountain pen?? I thought those had died out decades ago! But no, she was writing with a bona fide fountain pen. It was beautiful.

For a week starting that afternoon, I spent all my free time researching fountain pens on the internet. My lab partner had recommended gouletpens.com as a good source of pens, ink samples, and information. From there I found a whole fountain pen community on the internet. There are forums, blogs, stores... All the things I had come to expect from the internet foodie community, I found for fountain pens. I learned about proprietary cartridges, cartridge converters, and converting cartridge pens to eyedropper pens. I saw a range of 3 dollar disposable fountain pens to pens worth hundreds of dollars and inlaid with Japanese lacquer. 
From pens I went to paper, and I read about super smooth French Clairefontaine paper that weighs 90g per square meter. I read at least 30 various notebook reviews. I found writing samples of different pens and inks on different papers. It was an obsession.

Finally, I deposited my paychecks and bought everything I needed to start my fountain pen experience: a $4 Fine Platinum Preppy, three ink samples (Noodler's Blue-Black, Private Reserve Purple Ebony, and Rohrer & Klingner Alt-Goldgrun) and a Clairefontaine notebook. 

The Platinum Preppy
The Preppy's nib
The Preppy came with a cartridge of purple ink.
After reading about the ink that comes with the Preppy and being disappointed by its quality, I decided to not use the cartridge right away.  Instead, I did an "eyedropper conversion" so that I could use better inks. I got some silica grease from my lab partner and now I use the barrel of the pen to store ink! I used a syring to fill the pen with Noodler's blue-black ink.

2mL ink samples from Goulet Pens
10mL blunt tipped syring for dispensing ink
Now I had a working pen! Writing with a fountain pen is cool because I barely need to put any pressure on the paper to write. The ink just flows. Naturally, I then needed to test this pen everywhere. I first tried out the fancy French paper.
Clairefontaine's A5 "Basic Life. Unplugged" Notebook
It is clothbound!
Clairefontaine paper is well known in fountain pen circles for its smooth surface and absorbance. It is supposed to have minimized feathering (little spikes around lines) and minimized bleed through. I was not disappointed. I tested the paper with all the pens I could find in my room:
Various pens
No see-through!
A cool part of using fountain pens is shading. Shading is the effect of having different parts of letters have different amounts of ink. On the picture below, some strokes are lighter and more blue/green, and others are closer to black.


Close ups of the various pens are here

I also used my fountain pen on more standard papers. My "Evidence Ampad" recycled paper notebook actually fared very well. It had little bleed through although it did have some feathering.

Thin printer paper did not have as smooth strokes. Notice the feathering on the f. 

In conclusion, the platinum preppy is a fun pen to use, the ink I got has pretty shading, and fancy paper is nice but not necessary. However, I do find the lines a bit thick. After a bit of research, the most thin but reasonably priced fountain pen I could find is the Pilot Penmanship with an Extra-Fine nib, it is the next pen I will get. It has a nice looking clear barrel that could be converted to an eye-dropper pen, although I might get a cartridge converter to keep it cleaner. Cartridge converters are basically refillable cartridges that can be used with any ink.  

Now I want to go back to writing on random different types of papers with my Preppy pen :)

(Actually, I'm going to work on chem homework...)

Tuesday, March 12, 2013

Grapefruit


Sometimes you just need a bowl of sweet, pink, grapefruit to get you through Ecology homework.

Sunday, February 24, 2013

Orange Peels and Liquid CO2


This post is not about food. Well, it not about eating food. Although eating did happen. This post is about Science. With a capital S.

This post is about a molecule called limonene. As you may be able to guess from the name, limonene is what makes citrus fruit smell cirtusy. It looks like this:
limonene
For my carbon compounds lab, we extracted limonene from orange peels. If you know anything about organic chemistry, you can see that limonene is made only of carbons and hydrogens. So, it is rather non-polar*. The traditional way to extract limonene is to mix watered orange peel mush with diethyl ether. The diethyl ether is less polar than water, so the limonene goes hangout with its bat-shaped buddy. Then you let the layers separate, like oil and water, and keep just the diethyl ether layer. Yay! But now your limonene is floating around in anesthetic diethyl ether, so you pour your solution into this cool spinning vacuum pump that vaporizes the solvent to purify your limonene.
diethyl ether (see, it looks like a bat!)
* A "polar" molecule is one with an uneven distribution of electrons such that one side of the molecule is more negative than the other. This happens because the elements to right side of the periodic table (O, Cl, etc) tend to be more attractive to electrons than elements to the left, like C and H.

Getting limonene is all very great, but you used a fair amount of solvent that must now be disposed of as hazardous waste. This is expensive and not very green. What to do?

Enter carbon dioxide:
carbon dioxide
As you can see, carbon dioxide is a linear molecule, so even though the oxygens pull on the electrons, they cancel each other out and neither side of the molecule has a higher electron density than the other. Therefore, CO2 is non-polar. CO2 is also a gas, which makes it not very convenient for dissolving things. However, if you look at the phase diagram below, you can see that we can get liquid CO2 by raising the pressure. 
CO2 phase diagram (from wikipedia)
To recap: carbon dioxide + pressure = liquid carbon dioxide. liquid carbon dioxide + orange peel = extracted limonene.

Here is the set up for the extraction:

I zested an orange.

With a copper wire and some filter paper, I set up a little stage for the orange peel to be elevated above the bottom of the centrifuge tube.

I packed dry ice (solid CO2) above the orange peel, capped the tube and dropped it into hot water. 
Here pressure builds up in the tube and the carbon dioxide melts, dribbles through the orange peel, taking limonene with it. Since the cap's seal is not completely gas-tight, the carbon dioxide finds ways out and vaporizes, leaving limonene at the bottom of the tube. 
I repeated steps 3 and 4 four times to build up limonene at the bottom.

Now I have limonene without generating any hazardous waste! Yes, carbon dioxide is a greenhouse gas, but the dry ice was made from CO2 that was already in the atmosphere, so there is no net harm. 

Here is a video of the dry ice melting:

Of course, at the end of the lab period, we all ate our oranges!


Tuesday, January 15, 2013

Bagels


Hi! I made bagels. They were round, and had a hole in the middle. See?


Just like a bagel should be. And it wasn't even too difficult! I followed the recipe in Peter Reinhart's The Bread Baker's Apprentice. Sure, there were a couple specialty ingredients, such as malt powder

I got this stuff from my local beer brewing store.
and high gluten bread flour, such as King Arthur brand, but all in all, the recipe is pretty straightforward. 

These bagels have a pretty crusty crust, and a dense and chewy crumb. I recommend eating them.

The recipe takes 2 days. The first day is pretty involved, but you only need an hour or so on the second day. According to Reinhart, allowing the dough to ferment slowly overnight allows it to develop deeper flavors. to get maximum flavor, this recipe uses both a sponge and overnight fermentation. 

The quantities listed will make 12 standard sized bagels

Ingredients:

Sponge
  • 1 tsp instant yeast (none of that old fashioned active dry stuff)
  • 510g / 18oz / 4 cups high gluten bread flour (It is generally better to measure flour by weight or mass rather than volume, because flour density is very variable.)
  • 2.5cups water
Dough
  • 1/2 tsp instant yeast
  • 482g / 17oz / 3.75 cups high gluten bread flour
  • 2 3/4 tsp salt
  • 2 tsp malt powder
To Finish
  • 1 tbsp baking soda (although this quantity doesn't mean anything because Reinhart does not specify the amount of water to dilute it in...)
  • toppings: sesame seeds, poppy seeds, rehydrated dried garlic/onion, cheese, salt, etc... 
    to rehydrate, just add water!
Method (slightly simplified from the original):

  1. Mix together the "sponge" ingredients, the dough should look like pancake batter.
  2. Let the sponge sit, covered, at room temperature for 2 hours (until it is foamy and bubbly and has doubled in size.)                                          
  3. bubbles!
  4. To the sponge add the "dough" ingredients. Stir well with a spoon or your hands to form a coarse, shaggy dough. 
  5. If you are kneading by hand, turn out the dough onto a floured surface and knead for 10 minutes. If you have a stand mixer, have the machine knead the dough with the dough hook for 6 minutes.   Either way, the dough should be "satiny and pliable, but not sticky" (Reinhart).
  6. Divide the dough into 12 pieces (each about 128g / 4.5oz). Cover with a damp towel and allow to rest 20 minutes.
  7. To make the bagel shape, poke a hole into the center of a piece and shape the dough into an even bagel shape. The hole should be about 1 in in diameter. 
  8. Line 2 sheet pans with parchment paper, and place the raw bagels on it. Let the dough sit for 20 minutes, then put it in the fridge overnight or for up to 3 days. 
    transporting bagel dough
  9. The next day, preheat the oven to 500F and bring a wide pot of water to boil. Add the baking soda to the water.
  10. Take the bagels out of the fridge and drop a couple of them into the water (only as many as can fit comfortably on the surface of the water)
  11. Boil the bagels for one minute on each side. 
    boiled bagels
  12. Sprinkle the baking sheets with semolina or cornmeal and place the boiled bagels on it. Top the bagels with desired toppings (I like sesame+poppy+garlic.) Note: to prevent the garlic from burning, you need to soak it in a bit of hot water to rehydrate it before using.
    toppings!
  13. Bake the bagels for 5 minutes at 500F, rotate the pans and bake until golden, about another 5 minutes.
  14. Let the bagels cool for 15 minutes on a cooling rack. 
    Om nom nom
  15. Slice the bagel open, and spread with cream cheese! 
    No bagel is complete without cream cheese.
     
  16. Cheese on top is also good.

Wednesday, January 2, 2013

Chocolate Cream Dacquoise


Hey ya'll, it's me again, and I have a Chocolate Cream Dacquoise to present to you: [hazelnut meringue, chocolate cream, whipped cream]x3 + [hazelnut meringue, whipped cream, caramelized hazelnuts].
 This dessert is a bit more complicated than my usual adventures, but it was christmas, which in my family means "time to eat lots of food", so I figured it would be a good time to try something fancy. Of course, as I was making it, I was convinced the meringues had burnt and that the pudding had curdled (it had, twice), but it turns out it is very difficult to make hazelnuts, cream, and chocolate taste bad.

Because this dessert is a pretty big undertaking, I'm too lazy to type up the recipe, so instead I'll entertain you with my research about dessert naming.

Dacquoise: a female inhabitant of the city of Dax, or a dessert made of layers of hazelnut or almond meringue filled with buttercream.

The red flag is Dax.
According to en.wikipedia.org, a marjolaine is a dacquoise with chocolate buttercream. However, fr.wikipedia.org makes no mention of marjolaine. In fact, searching for marjolaine in Google.fr only brings up marjoram, pictures of women named Marjolaine, and websites in English gushing about the supposedly French dessert of marjolaine. However, when I searched for "marjolaine dacquoise" in google.fr and insist on only pages in French, I do get a couple hits for French blogs making marjolaine.

Conclusions: Marjolaine is much more widely used to refer to a chocolate Dacquoise in English than in French. The small amount of usage in French is possibly due to feedback from English (French is currently borrowing a lot of words from English).


General gist of recipe (from Trish Deseine's I want Chocolate):

2 cups of hazelnuts
stirred into 12 beaten egg whites and 3/2 cups of sugar to make the meringue. This mixture is formed into 4 disks and baked for an hour at 275F.

For the chocolate cream, I beat 6 egg yolks, 1/4 cup sugar, and 2 tbsp flour until pale and frothy. I heated up 3/2 cup cream and 3/2 cup milk until almost boiling, and poured it into the egg yolks.

The yolk-cream was put back in the pan and brought to a boil (this is where the curdling happened, whoops!). Once the cream thickened, I added 4oz dark chocolate and stirred well. I cooled the cream in the refrigerator.

Now the layering! Meringue, chocolate cream,

whipped cream, grated dark chocolate. 

I made some caramel, mixed in some roasted hazelnuts, and crumbled it all on top.

The chocolate cream is kind of oozing everywhere.